
Use this earthworm dissection guide to orient a specimen, identify major structures, and explain how its body systems work together. The labeled overview, original specimen images, and observation sequence support a high school biology lab or a diagram-based activity.
Student resources: Earthworm Worksheet and the existing Earthworm Dissection Study Guide (Word). Preview the legacy questions before assigning them; the teaching notes below explain their limits.
Learning goals and materials
- Distinguish anterior/posterior and dorsal/ventral directions.
- Trace food from the mouth through the digestive tract to the anus.
- Use position and connections to identify structures, and separate an observation from an inferred function.
Prerequisites: tissues and organ systems, directional terms, and basic animal classification. Materials: preserved earthworm, dissecting tray, hand lens, blunt probe, forceps, teacher-approved scissors and pins, PPE, and an observation sheet. Use tools appropriate to the specimen and students’ training.
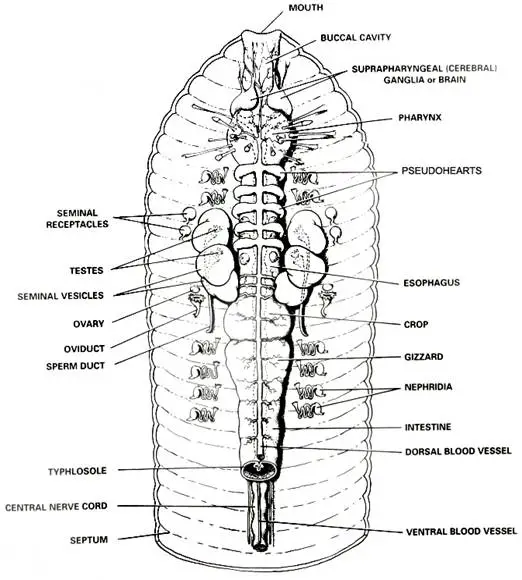
Labeled earthworm anatomy overview
An earthworm is a segmented annelid, not an insect. The mouth is at the anterior end and the anus is at the posterior end. On a mature specimen, the clitellum is closer to the anterior end; confirm orientation using several landmarks.
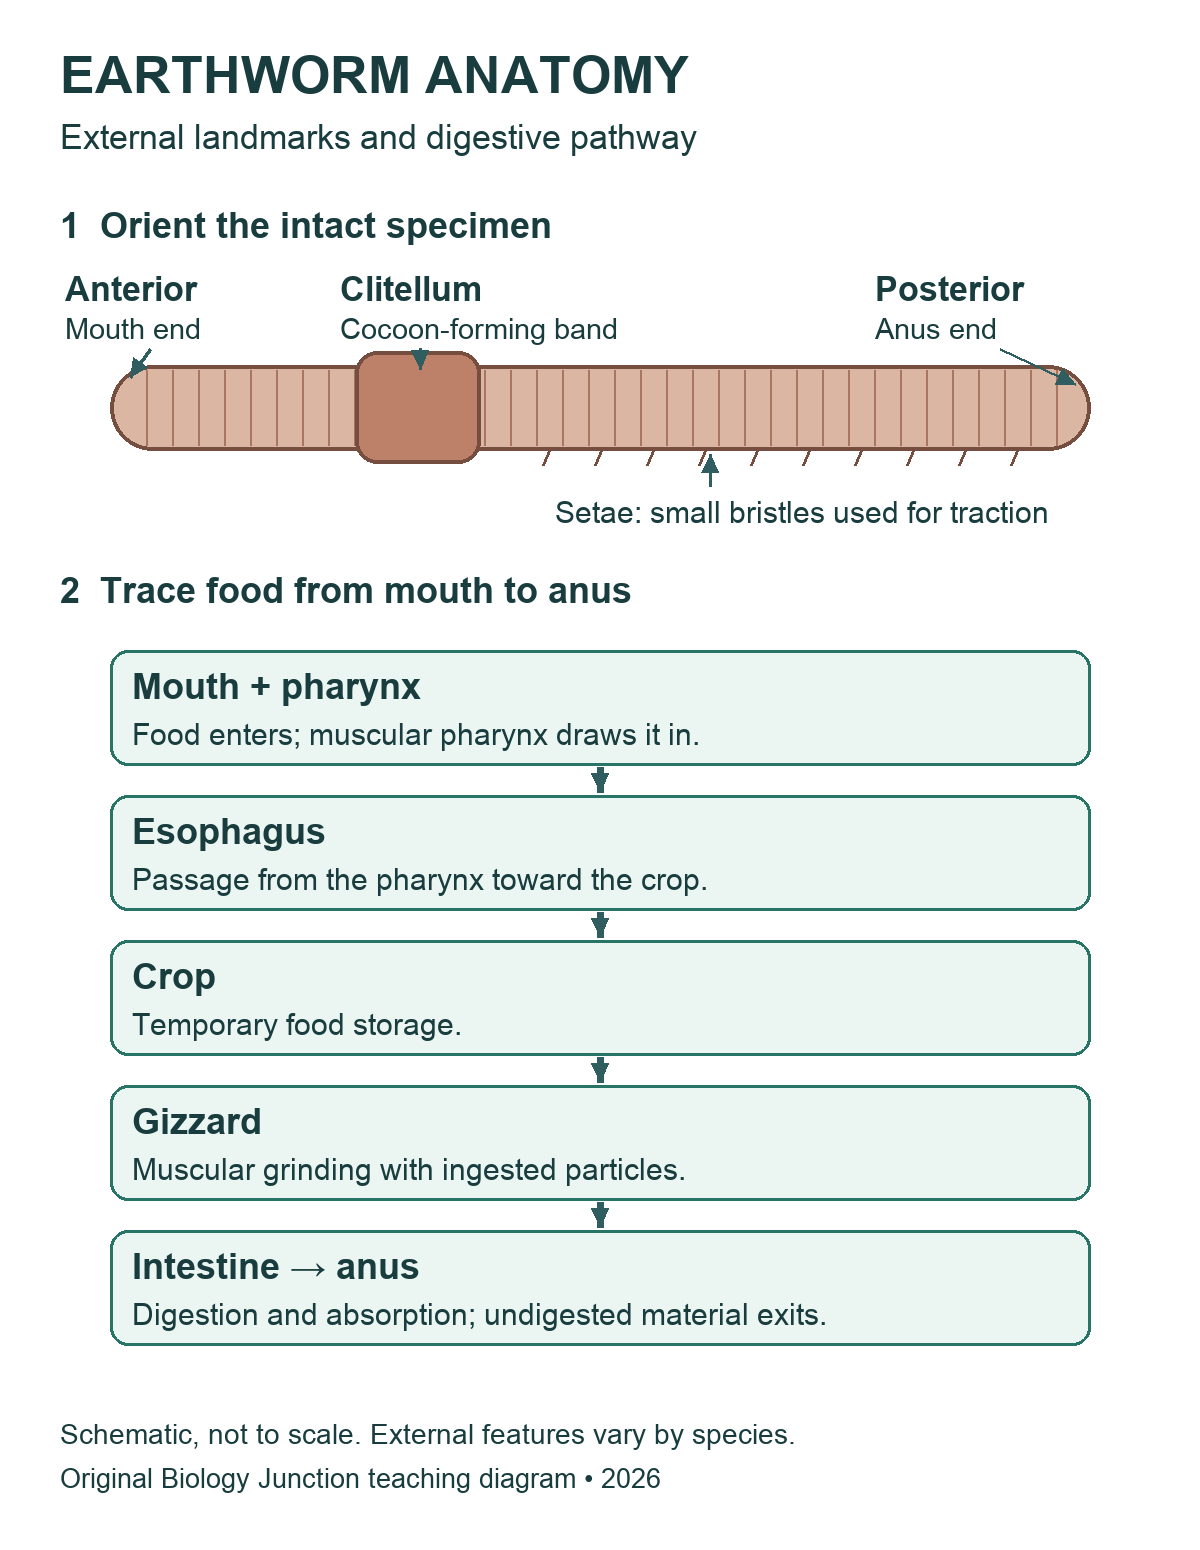

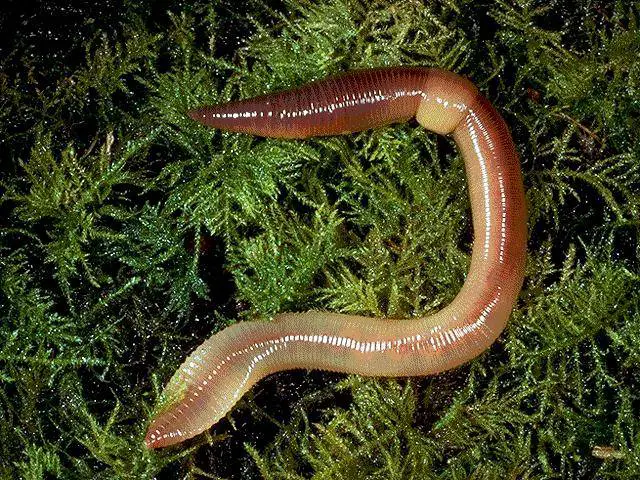
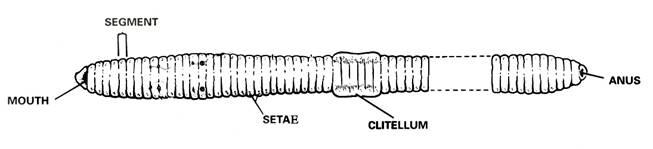
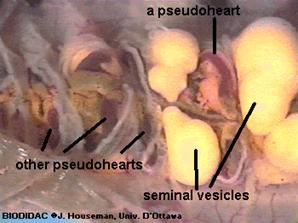
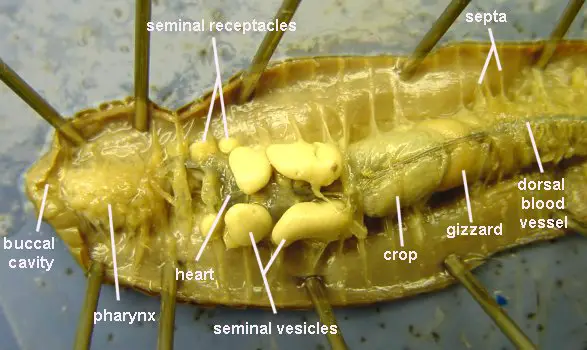
Existing diagram credit retained: Modern Biology, Holt. Existing photograph credits, including BIODIDAC/J. Houseman, University of Ottawa, remain visible within the original images. The new overview is an original illustration, not a tracing of those figures.
Teacher preparation and safety
Use commercially supplied preserved specimens in a supervised school lab. Before class, review the specimen label, supplier’s safety data sheet (SDS), school risk assessment, ventilation requirements, and storage and disposal procedures. Demonstrate handling and cutting with the actual tools students will use. Require appropriate splash goggles, preservative-compatible gloves, and protective clothing. Keep hands behind the cutting edge and work in a tray. No food or drink.
Rinse or drain a specimen only if the product instructions and school procedure permit it; do not assume preservative belongs in a sink. Report a cut, splash, or spill promptly and follow the lab’s response procedure. Collect tissue, liquids, and sharps as directed, clean the station, and wash hands. A diagram, model, or teacher demonstration can support an alternative activity.
Review the biology lab safety expectations, NSTA’s dissection safety guidance, and the supplier’s specimen FAQs. These general notes do not replace the product-specific procedure.
External anatomy: what to identify first
Lay the intact specimen in the tray. The dorsal surface is usually rounder and darker, and the ventral surface flatter; preservation can alter color. Locate the prostomium, a small lobe over the mouth, then identify segments, the clitellum, and setae. The clitellum is glandular tissue involved in cocoon formation, not an ovary or testis. Tiny reproductive pores may be difficult to see without magnification.

Many classroom specimens are Lumbricus terrestris, but identify the supplied species from its label rather than appearance alone. Older materials may place earthworms in “Oligochaeta”; current overviews commonly discuss earthworms within Clitellata. Class names and segment landmarks can differ among references.
Teacher-led observation sequence
- Orient: sketch the intact specimen and label both ends and dorsal/ventral directions. Record the features used to decide.
- Observe externally: use a lens for setae, segments, and clitellum. Do not grade an indistinct pore as though it must be visible.
- Open only after demonstration: place the specimen ventral side down. The teacher selects the shallow dorsal opening for the supplied specimen. Lift the body wall away from organs and advance slowly with approved scissors; stop if the tissue layer is unclear.
- Expose gently: with guidance, separate only the septa needed to fold back and secure the body wall. Avoid pulling on the digestive tube or dorsal vessel.
- Trace before removing: find the pharynx, esophagus, crop, gizzard, and intestine in order. Compare appearance and connections; do not identify an organ by color alone.
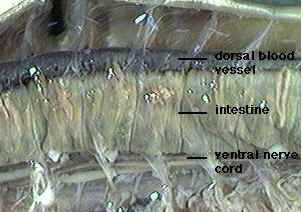
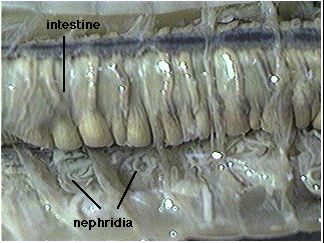
- Compare systems: locate the dorsal vessel and aortic arches if intact. Examine the ventral nerve cord and nephridia only as directed; moving or removing the gut can damage evidence needed for later observations.
- Record uncertainty: label unclear structures “not resolved” and compare with a reference. Finish the class observation sheet, store or dispose as directed, clean the station, and wash hands.
Organs and body systems
| Structure | What to explain |
|---|---|
| Crop and gizzard | The crop temporarily stores food; the muscular gizzard grinds it with ingested particles. They have different roles. |
| Intestine | Digestion and nutrient absorption occur here. Undigested material leaves through the anus; this is distinct from excretion by nephridia. |
| Aortic arches and vessels | In the familiar Lumbricus lab model, five pairs of aortic arches connect major vessels. The closed circulatory system is distinct from the digestive tube. Use the supplier’s reference for the actual species. |
| Ventral nerve cord and ganglia | A ventral cord connects segmental nervous structures; cerebral ganglia occur near the anterior end. The cord is not a blood vessel. |
| Nephridia | Excretory tubules remove metabolic wastes. They occur in many segments; avoid the absolute claim “two in every segment” for every earthworm. |
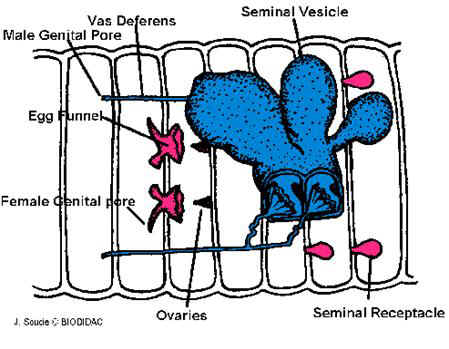
| Reproductive structures | Lumbricus has both male and female reproductive organs. Seminal receptacles store sperm received from another worm; the clitellum helps form a cocoon. Not every small structure will be visible in a routine dissection. |
| Body wall, setae and respiration | Circular and longitudinal muscles work with the fluid-supported body; setae provide traction. Gas exchange occurs through the moist body surface, not through lungs. |
Teaching notes and original checks
- Use anatomical landmarks and the supplied species reference before assigning exact segment numbers. The older page’s extra male-pore claim and fixed clitellum range are not suitable universal identification rules.
- The existing worksheet refers to a dissection ending at segment 32 and to numbered steps from an older procedure. Match those prompts to the procedure actually used; do not assume this revised guide shares the old numbering.
- Ask students what they could see. A preserved specimen does not demonstrate a heartbeat, feeding, or gas exchange in real time.
Check 1: A student labels the crop “food grinder.” What should change? The gizzard performs muscular grinding; the crop stores food temporarily. Support identification by tracing the connected tract.
Check 2: Is soil passing out of the anus the same process as nephridia removing metabolic wastes? No. Egestion of undigested material and excretion are different processes.
Check 3: Why is an unreadable pore not proof that an organ is absent? Preservation, size, lighting, and the viewing method limit what can be resolved. Record that limitation rather than inventing an observation.
Original specimen and diagram gallery
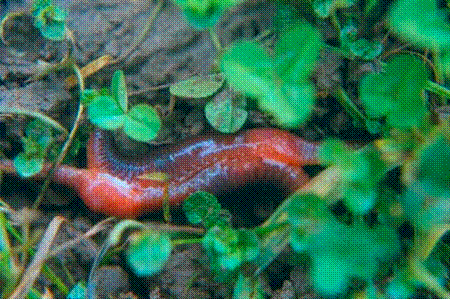
Compare the existing earthworm photographs and detailed drawings



Related teaching resources and sources
- Animal Dissections directory — choose another existing specimen guide.
- Annelid Review PDF page — legacy review; preview its diagrams and questions before assigning.
- Clam Dissection — compare an annelid with a mollusk without assuming identical body plans.
- Carolina: earthworm anatomy and dissection reference.
- OpenStax Biology 2e: annelids.
- University at Buffalo: labeled earthworm collection — external comparison photographs; not copied here.
The original checks above are explanations for this guide, not a verified answer key for every legacy worksheet. In the Annelid Review matching section, the esophagus should be described as the passage from the pharynx toward the crop; the supplied “connects the mouth & pharynx” choice needs correction before use. Its class-comparison table also uses historical group names.