Earthworm Worksheet

Name(s)_______________________________ Group_______ Date__________ Period_______

Earthworm Worksheet 


1. What is the name of the pumping organs of an earthworm?


2. Trace the parts of the digestive tract through which food passes.


3. Which parts of the earthworm serve as its brain?  How are these parts connected to the rest of the body?


4. Which of the parts of the worm’s body that you saw are included in the excretory system?


5. How can you find out whether an earthworm eats soil?


6. Among the earthworm’s structural adaptations are its setae. How do you think the earthworm’s setae make it well adapted to its habitat?


7. How is the earthworm’s digestive system adapted for extracting relatively small amounts of food from large amounts of ingested soil?


8. Your dissection of the earthworm did not go beyond segment 32. What will you observe if you dissect the remainder of the worm to its posterior end?


9. On a separate piece of paper, draw and label the parts of the earthworm you observed, and color code the systems. Use green for the reproductive system, yellow for the digestive system, blue for the excretory system, and red for the nervous system.


10. During mating, two earthworms exchange sperm. Fertilization is external, and cocoons are produced from which the young eventually emerge. Refer again to steps 5 and 11, where you located the earthworm’s reproductive organs. Use a reference to identify the role of each organ in the reproductive process of the earthworm. On a separate paper, summarize your findings.

BACK

Dichotomous Keying


Dichotomous Keying

Introduction to Dichotomous Key Maker:

The identification of biological organisms can be greatly simplified using tools such as dichotomous keys.  A dichotomous key maker is an organized set of couplets of mutually exclusive characteristics of biological organisms.  You simply compare the characteristics of an unknown organism against an appropriate dichotomous key.  These keys will begin with general characteristics and lead to couplets indicating progressively specific characteristics. If the organism falls into one category, you go to the next indicated couplet.  By following the key and making the correct choices, you should be able to identify your specimen to the indicated taxonomic level.

Couplets can be organized in several forms.  The couplets can be presented using numbers (numeric) or using letters (alphabetical).  The couplets can be presented together or grouped by relationships.  There is no apparent uniformity in presentation for dichotomous keys.

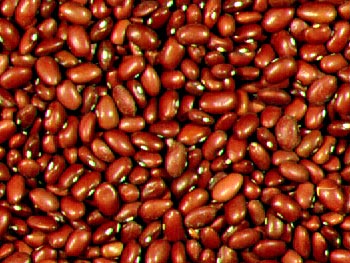
Sample keys to some common beans used in the kitchen:

Numeric key with couplets presented together.  The major advantage of this method of presentation is that both characteristics in a couple can be evaluated and compared very easily.


1a. Bean round Garbanzo bean
1b. Bean elliptical or oblong Go to 2
2a. Bean white White northern
2b. Bean has dark pigments Go to 3
3a. Bean evenly pigmented Go to 4
3b. Bean pigmentation mottled Pinto bean
4a. Bean black Black bean
4b. Bean reddish-brown Kidney bean


Alphabetical key with couplets grouped by relationship.  This key uses the same couplet choices as the key above.  The choices within the first and succeeding couplets are separated to preserve the relationships between the characteristics.


A. Bean elliptical or oblong Go to B
   B.  Bean has dark pigments Go to C
            C.  Bean color is solid Go to D
            C.  Bean color is mottled Pinto bean
                     D.  Bean is black Black bean
                     D.  Bean is reddish-brown Kidney bean
   B.  Bean is white White northern
A. Bean is round Garbanzo bean


Rules for Using Dichotomous Keys: 

When you follow a dichotomous key, your task becomes simpler if you adhere to a few simple rules of thumb:

  1. Read both choices in a couplet carefully.  Although the first description may seem to fit your sample, the second may apply even better.
  2. Keep notes telling what sequence of identification steps you took.  This will allow you to double-check your work later and indicate sources of mistakes, if they have been made.
  3. If you are unsure of which choice to make in a couplet, follow both forks (one at a time).  After working through a couple of more couplets, it may become apparent that one fork does not fit your sample at all.
  4. Work with more than one sample if at all possible.  This will allow you to tell whether the one you are looking at is typical or atypical.  This is especially true when working with plants – examine more than one leaf, branch, cone, seed, flower,…etc.
  5. When you have keyed out an organism, do not take your effort as the final result.  Double check your identification scheme, using your notes.  Find a type specimen (if available) and compare your unknown to the type specimen.  If a type specimen is unavailable, find a good description of the indicated taxonomic group and see if your unknown reflects this description.
  6. When reading a couplet, make sure you understand all of the terms used.  The best keys will have a glossary of technical terms used in the key.  If a glossary is unavailable, find a good reference work for the field (textbook, biological dictionary,…etc.) to help you understand the term.
  7. When a measurement is indicated, make sure that you take the measurement using a calibrated scale.  Do not “eyeball” it or take a guess.

Exercise 1:

Using a container of beans, use one of the dichotomous keys above to identify the beans.  Glue the beans to the card provided and label them with their common name. Indicate what steps you followed to arrive at your answer.  Turn the card in to your instructor.  Compare your answers to the instructor’s descriptions and type specimen.

Exercise 2:

Obtain samples of the snack chips provided.  Develop a dichotomous key to identify the snacks.  In your notebook, keep track of the characteristics you used to differentiate between the different snack families.  What are the values of the characteristic for each snack food?

Exercise 3:

Use the dichotomous key to conifers provided below to identify conifers.

A Key to Selected North American Native and Introduced Conifers


01a Leaves needle-like Go to 02
01b Leaves flattened and scale-like Go to 27
02a Leaves are in clusters Go to 03
02b Leaves are borne singly Go to 15
03a Two to five leaves in a cluster Go to 04  Genus Pinus
03b More than five leaves in a cluster Go to 14
04a Leaves mostly 5 in a cluster White Pine (Pinus strobus)
04b Leaves 2 or 3 in a cluster Go to 05
05a Leaves mostly 3 in a cluster Go to 06
05b Leaves mostly 2 in a cluster Go to 08
06a Leaves twisted, less than 5 inches long Pitch Pine (Pinus rigida)
06b Leaves straight, more than 5 inches long Go to 07
07a Leaves 5-10 inches long, cones very thorny Loblolly pine (Pinus taeda)
07b Leaves mostly over 10 inches long, cones unthorned Longleaf pine (Pinus palustris)
08a Leaves mostly longer than 3 inches Go to 09
08b Leaves mostly shorter than 3 inches Go to 11
09a Leaves rigid, bark grayish Black pine (Pinus nigra)
09b Leaves narrower than 1.6mm; bark reddish brown or brown Go to 10
10a Cones thornless, twigs brown Norway pine (Pinus resinosa)
10b Cones thorny, twigs whitish Shortleaf pine (Pinus echinata)
11a Leaves mostly wider than 1.5 mm Go to 12
11b Leaves mostly narrower than 1.5 mm Go to 13
12a Leaves mostly longer than 35 mm Mugho pine (Pinus mugo)
12b Leaves mostly shorter than 35 mm Jack pine (Pinus banksiana)
13a

Twigs whitened

Virginia pine (Pinus virginiana)
13b Twigs not whitened Scotch pine (Pinus sylvestris)
14a Leaves deciduous, clusters of 20-40 Larch (Larix sp.)
14b Leaves persistent, stiff, and four sided True cedar (Cedrus sp.)
15a Needles short and sharp Giant Sequioa  (Sequioadendron giganteum)
15b Needles longer than 12 mm Go to 16
16a Tiny pegs on twigs Go to 17
16b No pegs on twigs Go to 22
17a Pegs square, needles sharp Go to 18 Genus Picea
17b Pegs round, needles flat and blunt Hemlock (Tsuga sp.)
18a Leaves dark green or yellow green Go to 19
18b Leaves blue-green Go to 20
19a Branchlets droop Norway spruce (Picea abies)
19b Branchlets do not droop Red spruce (Picea rubens)
20a Leaves at right angles to stems Blue spruce (Picea pungens)
20b

Leaves point forward

Go to 21
21a Leaves about 12 mm long, seed cones 15-32 mm in length, crown narrow and pointed Black spruce (Picea mariana)
21b Leaves about 19 mm long, seed cones 50 mm in length, spire-like crown

White spruce (Picea glauca)

22a Buds large and pointed Douglas fir (Pseudotsuga sp.)
22b Buds small and rounded Go to 23
23a Terminal buds round and clustered True fir (Abies sp.)
23b Terminal buds not clustered Go to 24
24a Needles white underneath Go to 25
24b Needles green underneath Go to 26  Genus Taxus
25a Needles pointed

Redwood (Sequoia sempervirens)

25b Needles blunt Hemlock (Tsuga sp.)
26a Leaves 18 mm long or less with inconspicuous midrib American Yew (Taxus canadensis)
26b Leaves 25 mm long or more with conspicuous midrib Japanese Yew (Taxus cuspidata)
27a All leaves short and sharp Giant Sequioa  (Sequioadendron giganteum)
27b Some leaves not sharp Go to 28
28a Cones round Go to 29
28b Cones not round Go to 31
29a Cones soft and leathery Juniper (Juniperus sp.)
29b Cones woody Go to 30
30a Cones under 12 mm in diameter False cypress  (Chamaecyparis)
30b Cones over 12 mm in diameter Cypress (Cuppressus)
31a Cones resemble rosebuds White cedar or arbor vitae (Thuja)
31b Cones resemble duck bills Incense cedar (Calocedrus)


Conifers to Identify:

1. Name: 2. Name:

3. Name: 4. Name:

5. Name: 6. Name:


7. Name: 8. Name:


9. Name: 10. Name:


11. Name: 12. Name:


13. Name: 14. Name:


15. Name: 16. Name:

Photos Copyright Nearctica.com

Click here for correct answers to conifer key

 

Echinoderm

Echinoderms

All Materials © Cmassengale  

Phylum Echinodermata
Characteristics

  • All marine
  • Known as spiny-skinned animals
  • Endoskeleton known as the test is made of calcium plates or ossicles with protruding spines
  • Includes sea stars, brittle stars, sand dollars, sea urchins, & sea cucumbers
  • Undergo metamorphosis from bilateral, free-swimming larva to sessile or sedentary adult
  • Larval stage known as dipleurula or bipinnaria
  • Adults have pentaradial ( 5 part) symmetry
  • Lack segmentation or metamerism
  • Coelomate
  • Breathe through skin gills as adults
  • Capable of extensive regeneration


Bipinnaria Larva

  • Ventral (lower) surface called the oral surface & where mouth is located
  • Dorsal (upper) surface known as aboral surface & where anus is located
  • Have a nervous system but no head or brain in adults
  • No circulatory, respiratory, or excretory systems
  • Have a network of water-filled canals called the water vascular system to help move & feed
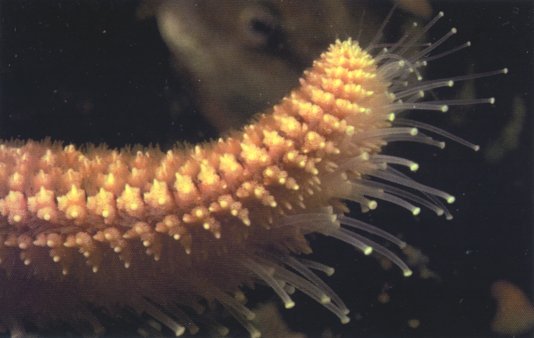
  • Tube feet on the underside of arms help in moving & feeding
  • One-way digestive system consists of mouth with oral spines, gut, & anus
  • Deuterostomes (blastopore becomes the anus)
  • Separate sexes
  • Reproduce sexually & asexually
  • Includes 5 classes:
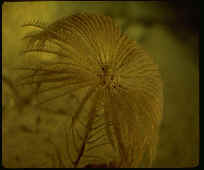
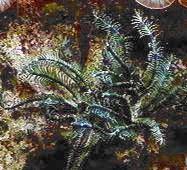
    * Crinoidea – sea lilies & feather stars
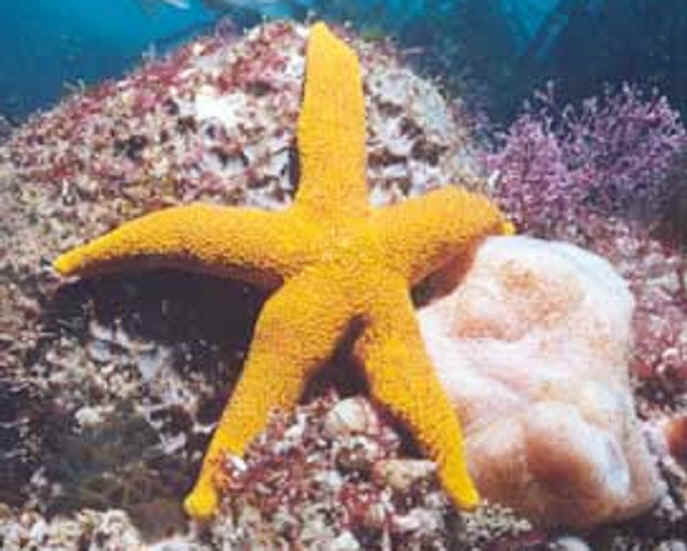
    * Asteriodea – starfish
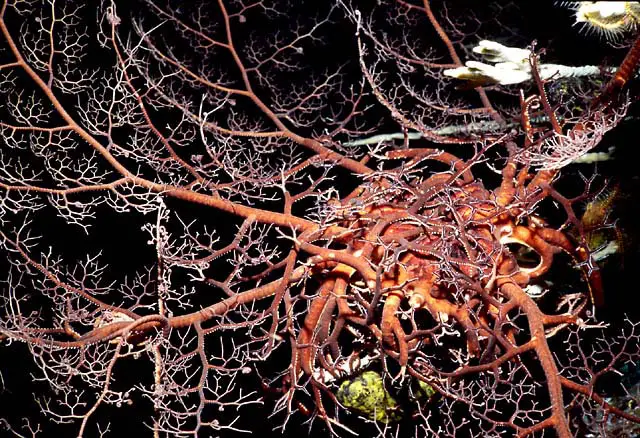
    * Ophiuroidea – basket stars & brittle stars
    * Echinoidea – sea urchins & sand dollars
    * Holothuroidea – sea cucumbers

Class Crinoidea
Characteristics

  • Sessile
  • Sea lilies & feather stars


FEATHER STAR

SEA LILY


  • Have a long stalk with branching arms that attach them to rocks & the ocean bottom
  • Can detach & move around
  • Mouth & anus on upper surface
  • May have 5 to 200 arms with sticky tube feet to help capture food (filter feeders) & take in oxygen
  • Common in areas with strong currents & usually nocturnal feeders

Class Asteroidea
Characteristics

  • Usually sedentary along shorelines
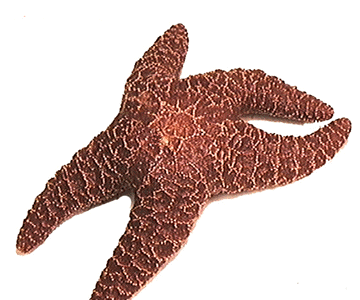
  • Starfish or sea stars
  • Come in a variety of colors
  • Prey on bivalve mollusks such as clams & oysters

Starfish Feeding on Clam

  • Have 5 arms that can be regenerated
  • Arms project from the central disk
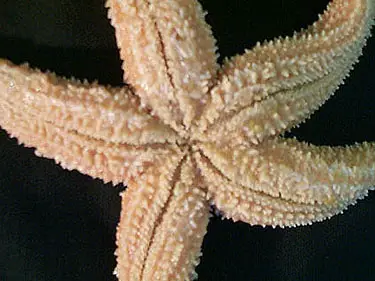
  • Mouth on oral surface (underside)


STARFISH

Class Ophiuroidea
Characteristics

  • Largest class of echinoderms
  • Includes basket stars & brittle stars


BASKET STAR

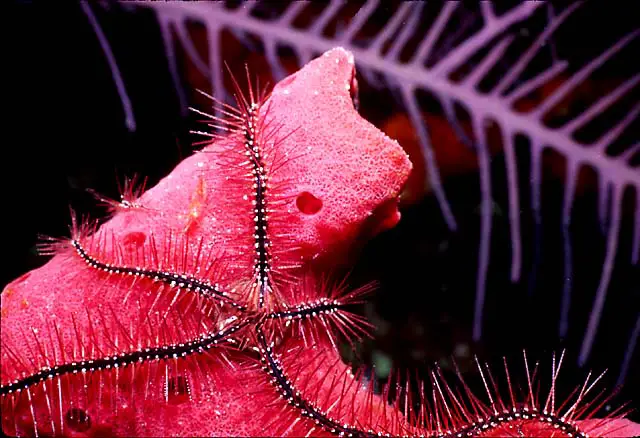
BRITTLE STAR


  • Live on the ocean bottom beneath stones, in crevices, or in holes
  • Have long, narrow arms resembling a tangle of snakes
  • Arms readily break off & regenerate
  • Move quicker than starfish
  • Feed by raking in food with arms or trapping it with its tube feet

Class Echinoidea
Characteristics

  • Includes sea urchins & sand dollars


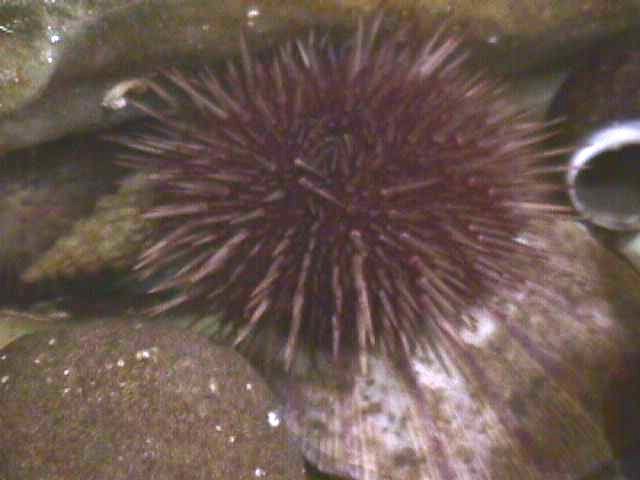
SEA URCHIN

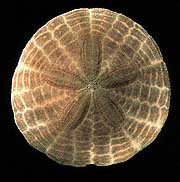
SAND DOLLAR


  • Internal organs enclosed by endoskeleton or test made of fused skeletal plates
  • Body shaped like a sphere (sea urchin) or a flattened disk (sand dollar)
  • Lack arms
  • Bodies covered with movable spines
  • Have a jawlike, crushing structure called Aristotle’s lantern to grind food
  • Use tube feet to move
  • Sea Urchins:
    * Spherical shape
    * Live on ocean bottom
    * Scrape algae to feed
    * Long, barbed spines make venom for protection
  • Sand Dollars:
    * Flattened body
    * Live in sand along coastlines
    * Shallow burrowers
    * Have short spines

Class Holothuroidea
Characteristics

  • Includes sea cucumber


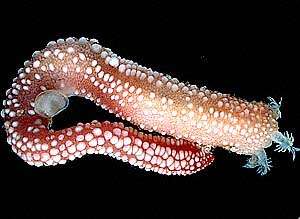
SEA CUCUMBER

  • Lack arms
  • Shaped like a pickle or cucumber
  • Live on ocean bottoms hiding in caves during the day 
  • Have a soft body with a tough, leathery outer skin
  • Five rows of tube feet run lengthwise on the aboral (top) surface of the body
  • Have a fringe of tentacles (modified tube feet) surrounding the mouth to sweep in food & water
  • Tentacles have sticky ends to collect plankton
  • Show bilateral symmetry
  • Can eject parts of their internal organs (evisceration) to scare predators; regenerate these structures in days

Structure & Function of Starfish
Body Plan

  • Range in size from 1 centimeter to 1 meter
  • Mouth located on oral surface (underside)
  • Have an endoskeleton made of calcium plates
  • Sharp, protective spines made of calcium plates called ossicles found under the skin on the aboral (top) surface


ABORAL SURFACE

  • Have pedicellariae or tiny, forcep-like structures surrounding their spines to help clean the body surface

Water Vascular System

  • Network of canals creating hydrostatic pressure to help the starfish move


WATER VASCULAR SYSTEM

  • Water enters through sieve plate or madreporite on aboral surface into a short, straight stone canal
  • Stone canal connects to a circular canal around the mouth called the ring canal
  • Five radial canals extend down each arm & are connected to the ring canal
  • Radial canals carry water to hundreds of paired tube feet


TUBE FEET

  • Bulb-like sacs or ampulla on the upper end of each tube foot contract & create suction to help move, attach, or open bivalves
  • Rows of tube feet on oral surface (underside) are found in ambulcaral grooves under each arm


Tube Feet in Ambulcaral Grooves

Feeding & Digestion

  • Tube feet attach to bivalve mollusk shells & create suction to pull valves apart slightly
  • Starfish everts (turns inside out) its stomach through its mouth & inserts it into prey
  • Stomach secretes enzymes to partially digest bivalve then stomach withdrawn & digestion completed inside starfish

Other Body Systems

  • No circulatory, excretory, or respiratory systems
  • Coelomic fluid bathes organs & distributes food & oxygen
  • Gas exchange occurs through skin gills & diffusion into the tube feet
  • No head or brain
  • Have a nerve ring surrounding the mouth that branch into nerve cords down each arm
  • Eyespots on the tips of each arm detect light
  • Tube feet respond to touch

Reproduction

  • Separate sexes
  • Two gonads (ovaries or testes) in each arm produce eggs or sperm
  • Have external fertilization
  • Females produce up to 200,000,000 eggs per season
  • Fertilized eggs hatch into bipinnaria larva which settles to the bottom after 2 years & changes into adult
  • Asexually reproduce by regenerating arms
BACK


Elephants Can’t Jump


It is a known fact that, unlike other animals, elephants can not jump! The bones in an elephant’s feet are too tightly packed and they’re too heavy.

On this page, you will find interesting questions  about other living things. Use the Google search engine on this page to help find the answers & then e-mail me your correct answer for test coupons.

The scientific name for the giraffe is Giraffa camelopardalis. What does this Latin name mean?

HOME


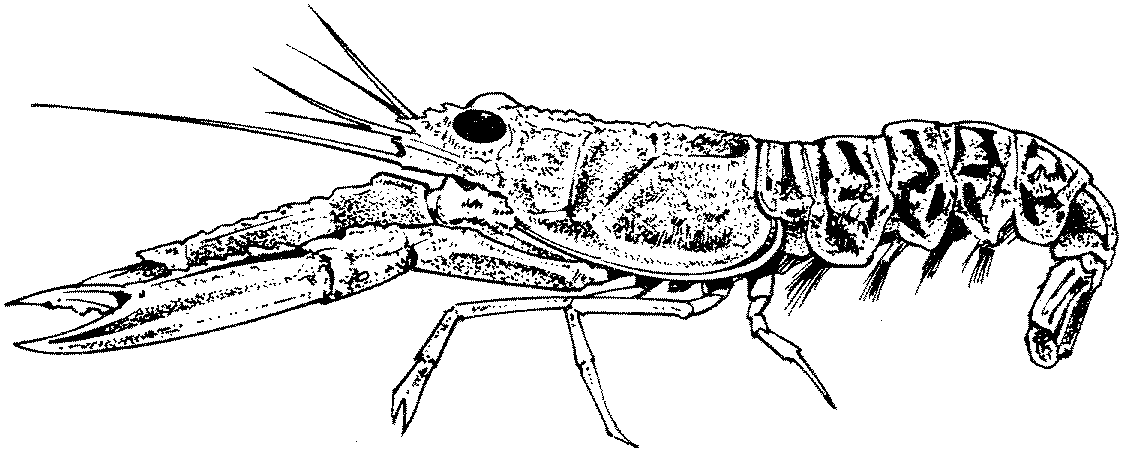
Crayfish Dissection


Crayfish Dissection


By Day:    Day 1        Day 2        Day 3

By Region: External Anatomy    Internal Anatomy

By Topic:      Skeletal       Integumentary     Cardiovascular     Muscular    Endocrine    Nervous
Reproductive     Respiratory    Excretory    Digestive


You must create a series of labeled drawings that illustrate the structures outlined below:

Day 1

I. Abdomen – Ventral View          (Day 1)         top

Place the crayfish supine (ventral surface up) on the dissecting tray and DRAW the following:


  1. Telson (What is the telson’s function?)
  2. Uropod  (Describe the location of the Uropod to the telson.   How do the add to the telson’s function?)
  3. Anus (In which of the two structures above did you find the anus? 1 or 2 way digestive system?)
  4. Swimmerets -numbered in pairs, 1-5 w/ the 5th one the most posterior (What is their function, and how is it different from the telson’s function?)
  5. Is your Crayfish a male or a female (Note the anterior-most swimmeret.   In the male, its function is to guide the sperm toward the female during copulation; as such, it will be enlarged, and pointed anteriorly in the male.  In the female there is no difference between the swimmerets)?  (Describe the appearance of the crayfish’s swimmerets in your answer.)
  6. Walking Legs (How many are there?  In terms of this feature alone, is this organism closer to an insect, or an arachnid?)
  7. Chelipeds – some people like this meat the best . . . (What is their function?)


II. Head – Ventral View             (Day 1-2)         top


  1. Mandibles – 2 – hard & white  (What are they equivalent to in humans?  How is their action – think direction of movement – different from that of humans?)
  2. Maxilla – softer w/ jagged edges  (Given the difference in texture, how is their function different from that of the mandibles?)
  3. Maxillapeds, or “mouth-feet” -3 pairs  (What is their function?  Why not use the Chelipeds?)
  4. Green Gland Ducts – (From what organ do they open out?  What is the equivalent organ in humans? What is the purpose of the duct?  Is its location at all disturbing to you?)


II. Cephalothorax – Dorsal View             (Day 1-2)         top

  1. Rostrum (What is cephalization?  Given that, what organ would you expect to be inside the rostrum?)
  2. Eyes (Does this organism have binocular vision – depth perception, why or why not?)


    Eye


  3. Carapace (What is the function of the carapace?  What two body systems in humans perform equivalent functions?  The support function is in reference to one system in particular; given the external location of the carapace, explain the name of the type of system compared to our own, internal variety.  The support function implies specifically the attachment of organs of what body system to the inside of the carapace?

Day 2

Make a Dorsal Midline Incision from the posterior end of the thorax to the posterior end of the rostrum using the rounded scissors w/ the rounded end down! Open the carapace and pin it back.

III. Thorax – Dorsal View, Part I          (Day 2)         top

  1. Heart & Ostia – the opening on the heart’s superior surface (Is this a sign of an open or closed circulatory system?  Differentiate between the two in your answer.)
  2. Gills (What are they equivalent to in humans?  To what body system do they belong?  Why are the gills so feathery – i.e., how does this aid in their function?)
  3. Cardiac Stomach -draw whole (There appear to be fibers attached to the outside of the stomach.  What is their purpose in relation to the stomach and the esophagus?)

IV. Thorax – Dorsal View, Part II         (Day 2)         top

  1. Remove one gill and draw on high power (What is the red/pink material within each “finger” of each gill?  How does this material relate to the function of the gill?)
  2. GENTLY remove one walking leg, and you will see that a gill is attached to each walking leg.  (How is this important to the function of the gills?  In your answer refer to the different requirements of the body during times of high physical activity, and how they are related to the gill-walking leg connection.)
  3. Cut open the Cardiac Stomach and draw the Gastric Mill – reddish-brown lateral “teeth” – on high power  (What is their function?  What type of digestion involves the gastric mill?  Do we accomplish that type of digestion in our own stomach?)

Day 3

V. Thorax – Dorsal View, Part III         (Day 3)         top

Gently remove the Heart.

  1. The Intestine (Given its location posterior to the stomach, what is its function?  What function of the stomach is lacking in the intestine?)
  2. The Hepatopancreas Gland (What two organs is this equivalent to in humans?  What are some of the functions of this gland?  How is its location important to its function?)
  3. The Seminifierous Tubules or Ovaries  (What is the function of each? To what body system do these belong?  Which of the two does your specimen contain?  How is this related to the swimmerets?)


VI. Thorax – Dorsal View, Part IV         (Day 3)         top

Gently remove the Cardiac Stomach.

  1. Esophagus  (Describe how it’s position relative to the stomach is different from the worm and the human.)
  2. Green Gland (What is/are the equivalent organ(s) in humans?   Do/does the analogous organ(s) appear in pairs in humans?  To what body system do the green glands belong?  What organ in our equivalent body system is missing in the crayfish?)
  3. Brain (Describe the appearance of the brain and the nerves in terms of the type of symmetry.  There are nerves that are attached to the front and the back of the brain.  Describe the function of both the anterior and the posterior nerve pairs.)

VII. Abdomen – Dorsal View, Part I       (Day 3)        top

Make a Dorsal Midline Incision from the anterior end of the abdomen to the posterior end of the abdomen using the rounded scissors w/ the rounded end down! Open the exoskeleton and pin it back.


In order for a Crayfish to determine BALANCE, it must insert a grain of sand in one of it’s appendages.
Every time it molts and makes a new exoskeleton, it must get a new grain of sand!
(In what part of the body is that function taken up by the human body?)


  1. Dorsal Blood Vessel  (Is this vessel sending the blood to, or away from, the heart?  What name would we give to that type of vessel in our body?)
  2. Large Intestine (How is the location of this organ related to the name of this section of the body [it is NOT a tail]?  What is the function of the large intestine?  Given it’s contents, is it wise, or unwise, to eat it when eating a lobster?  Explain.)
  3. Abdominal Flexor Muscles  (How do muscles function, by shortening,   lengthening, of both?  Moving the abdominal flexor muscles will cause flexion, but what is flexion?  How will the abdomen – it is NOT a tail – change shape during flexion?  What direction will the crayfish move during flexion?  Given the size and strength of the muscle, during what circumstances would the crayfish use this muscle over its walking legs?)

VIII. Abdomen – Dorsal View, Part II        (Day 3)        top

Gently remove the Abdominal Flexor Muscles.

  1. Ventral Blood Vessels  (Given that there is no main ventral blood vessel, how does the blood return to the heart?  Is this a sign of an open or closed circulatory system?)
  2. Ventral Nerve Cord  (To what phylum does the crayfish belong?   How is the location of the nerve cord different from creatures in our own phylum?   Name our own nerve cord.  How is the protection of the nerve cord different in both phyla?)

Drawings:

  1. Use a PENCIL!!

  2. Make the drawings “larger than life” size, as the specimens are so small.

  3. Draw the general shape (outline) and location of the organs, as the squiggles so many of you use to “shade” your drawings make your drawings sloppy and hard to interpret.

  4. Include Labels on all drawings.

  • Labels should start outside the drawing, and be connected to the structure by arrows with tips (===>).

  • The Tip of the arrow should be touching the structure.

  • Be sure to include the magnification for any drawings done with the dissecting microscope.

Hang on to the drawings; they will all be handed in later, together with some questions to answer!


Day 1        Day 2        Day 3         top

Modified from  Lazaroff Biology