Natural Selection in Teddy Grahams
Introduction
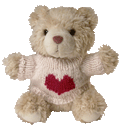
You are a bear-eating monster. There are two kinds of bears that you like to eat: happy bears and sad bears. You can tell the difference between them by the way they hold their hands. Happy bears hold their hands high in the air, and sad bears hold their hands down low. Happy bears taste sweet and are easy to catch. Sad bears taste bitter, are devious and hard to catch. Because of this you only eat happy bears. The happy trait in bears is caused by the expression of a recessive allele. The homozygous recessive condition is being happy. The sad trait is caused by a dominant allele. New bears are born every year (when they are hibernating in their den, the cardboard box), and the birth rate is one new bear for every old bear left from last year.
Materials:
Teddy Bear Grahams, lab worksheet, pencil
Procedure:
1. Obtain a population of 10 bears and record he number of happy and sad bears and the total population number. Using the equation for Hardy-Weinberg equilibrium, calculate the frequencies of both the dominant and recessive alleles and the genotypes that are represented in the population. Example: If 5 of the 10 bears are happy, then 10 out of 20 alleles would be happy alleles. Therefore the q2 number would be 0.5. You must then determine the q number by taking the square of 0.5.
2. Now, go hunting! Eat 3 happy bears. (If you do not have 3 happy bears then eat the difference in sad bears.)
3. Once you have consumed the bears obtain a new generation from your den (the box). You should only remove seven additional bears from the den for a total of 14 bears.
4. Repeat the procedures again. Be sure to record the number of each type of bear and the total population.
Table:
| Generations | P2 (sad) | 2pq (sad) | q2 (happy) | P | q |
| 1. Initial | |||||
| 2. | |||||
| 3. | |||||
| 4. |
Questions:
1. Describe what is happening to the genotype and allele frequencies in the population of Teddy Grahams?
2. What would you expect to happen if you continued the selection process for additional generations?
3. How would the frequencies change if you were to now select for the sad bears?
4. Why doesn’t the recessive allele disappear from the population? How is it protected?


 SpongeBob, Patrick, and Gary were thrilled when Mr. Krabbs gave their teacher a chemistry set! Mr. Krabbs warned them to be careful and reminded them to follow the safety rules they had learned in science class. The teacher passed out the materials and provided each person with an experiment book. SpongeBob and Gary flipped through the book and decided to test the properties of a mystery substance. Since the teacher did not tell them to wear the safety goggles, they left them on the table.
 SpongeBob lit the Bunsen burner, then reached across the flame to get a test tube from Gary . In the process, he knocked over a bottle of the mystery substance and a little bit splashed on Gary . SpongeBob poured some of the substance into a test tube and began to heat it. When it started to bubble he looked into the test tube to see what was happening and pointed it towards Gary so he could see. Gary thought it smelled weird so he took a deep whiff of it. He didn’t think it smelled poisonous and tasted a little bit of the substance.
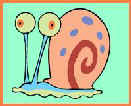 They were worried about running out of time, so they left the test tube and materials on the table and moved to a different station to try another experiment. Patrick didn’t want to waste any time reading the directions, so he put on some safety goggles and picked a couple different substances. He tested them with vinegar (a weak acid) to see what would happen even though he didn’t have permission to experiment on his own. He noticed that one of the substances did not do anything, but the other one fizzed. He also mixed two substances together to see what would happen, but didn’t notice anything. He saw SpongeBob and Gary heating something in a test tube and decided to do that test. He ran over to that station and knocked over a couple bottles that SpongeBob had left open. After cleaning up the spills, he read the directions and found the materials he needed. The only test tube he could find had a small crack in it, but he decided to use it anyway. He lit the Bunsen burner and used tongs to hold the test tube over the flame. He forgot to move his notebook away from the flame and almost caught it on fire.