Parts of a Compound Light Microscope
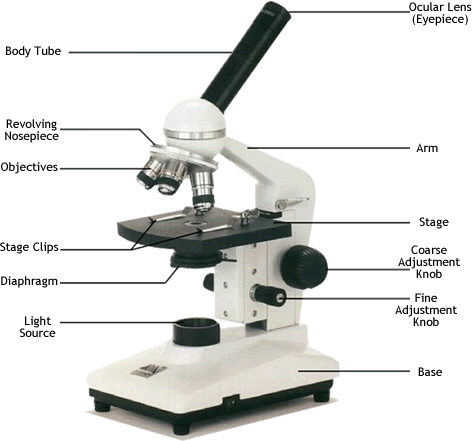
Parts of a Compound Light Microscope
| Metric Measurement Lab |  |
Part A: Count your drops!
Take a guess – How many drops of water will it take to equal 1 milliliter? _____ drops
Follow the directions to find the number of drops in 1 milliliter of water, then answer the questions. You will need a small graduated cylinder (25 ml), a beaker of water, and an eyedropper for this section. Remember to read the bottom of the meniscus when you are reading the volume of a liquid in a graduated cylinder.
|
 |
| # of drops to 11 ml | # of drops to 12 ml | # of drops to 13 ml | Average |
|
|
Based on your average, how close were you to your guess?________
Based on your average, how many drops would it take to make 1 liter? _______
Part B: Water Displacement
Follow the directions to find the volume of three marbles using water displacement.
| Volume of Water Before adding Marbles (ml) | Volume of Water After Adding Marbles (ml) | Difference in Volume (ml) | Volume of 3 Marbles |
|
|
Part C: Mass Mania
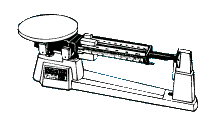
The gram is the standard unit of mass in the metric or SI system. The basic instrument used to measure mass is the mass balance. Some mass measurements can be made using an electronic balance.
|
 |
| Mass of Metric Ruler (g) | Mass of Empty 50-ml graduated cylinder (g) | Mass of 3 Marbles (g) |
|
|
Part D: Volume by Formula
Use the formula to find the volume of the box. Measure to the nearest centimeter before calculating your answer. If necessary, Round your answer to Two Decimal places.
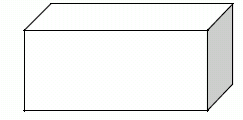
Volume = length x width x height
__________ x __________ x __________ =________________cm3
Part E: Color Challenge
1. Obtain the following items from your teacher:
2. Perform each step outlined below using accurate measurements.
3. Complete the chart.
| Test Tube | Color | Final Volume (ml) |
| A | ||
| B | ||
| C | ||
| D | ||
| E | ||
| F |
| Metric Measurement ppt Questions |
Metric System
1.When and by whom was the metric system developed?
2. The metric system is based on powers of ________.
3. Where is the metric system used?
4. The metric system is especially used by what group?
5. How is the metric system abbreviated & how did it get this abbreviation?
Metric Prefixes
6. Regardless of the ________, the metric system uses the __________ prefixes.
7. Give 3 of the most common metric prefixes and their value.
8. One meter equals how many centimeters? How many millimeters?
Length, Mass, and Volume
9. Define length.
10. What is the SI base unit for length?
11. _________ sticks or __________ rulers are used to determine length in the metric system.
12. Define mass.
13. If two object are the same size, will theyhave the same mass? Explain your answer.
14. What is the SI unit for mass?
15. What common object has approximately the mass of one gram?
16. How could you change the mass of an object?
17. A ___________ ___________ __________ is a scale used to measure metric masses.
18. Why will a triple beam balance give the same mass for an object no matter what planet it is on?
19. Define weight.
20. Explain why the weight of an object can change?
21. What is the SI unit for measuring weight?
22. What is gravity?
23. The force of gravity depends on what 2 things?
24. The greater the distance, gravity _________ so weight would be ____________.
25. The more mass an object has, the pull of gravity is _________ so the object will have ___________ weight.
26. How much less gravity does the moon have than the Earth?
27. If you had a mass of 36 kilograms on Earth, what would be your mass on the moon?
28. If you had a weight of 60 Newtons on Earth, what would be your weight on the moon?
29. What planet has 2.5 times more gravity than the Earth?
30. Would your mass be the same on Jupiter? your weight?
31. Define volume.
32. How do you find the volume of a box?
33. The units for the volume of a box would be _________ centimeters.
34. Find the volume of a cube that is 3 cm on all sides.
35. What is the base unit for the volume of a liquid?
36. What scientific equipment is used to measure the volume of liquids?
37. Liquids make a curved upper surface when poured into graduated cylinders, so you must read the _____________ of the curve known as the ________________.
38. In the metric system, 1 cm3 equals __________________ of water having a mass of ________________.
Water Displacement and Density
39. ____________ ______________ is a method used to tell the volume of irregularly shaped objects.
40. If a rock causes the water level in a graduated cylinder to rise from 8.8 to 10 ml, what is the volume of the rock?
41. What is the mass of 25 ml of water? (Hint: look back at your answer to question #38.)
42. What is the mass of 1 liter of water?
43. Define density.
44. When finding the density of an object, the ___________ of an object measured in ___________ is divided by its _____________ measured in ______________ or ______________.
45. What are the units of measurement for density?
46. Sketch the density wheel that can be used to solve density problems.
47. If you know the mass and density, how can you determine the volume using the density wheel?
48. Find the density if the mass of an object is 24 g and the volume is 8 cm3.
49. Find the volume if the density is 3g/cm3 and the mass is 24 grams.
50. Find the mass if the density is 2g/cm3 and the volume is 8cm3 .
51. What is the density of 1 gram of water?
52. What is the volume of .5 kg of water?
53. In terms of density, why do some objects float?
54. Objects with a density less than __________ will float on top of water.
55. A toy boat has a density of 1.5 g/ml. Will the toy boat float?
56. What is true about objects that have a density equal to water?
57. How do fish and submarines that are denser than water float?
58. Why did the Titanic float before it hit the iceberg?
59. Why did the Titanic sink after hitting the iceberg?
The metric system is based on the number 10.
| Main Units of Measurement | ||
| Length | Volume | Mass |
| meter (m) | liter (l) | gram (g) |
Using the above values (meter, liter, & gram) as the base, their value can be increased or decreased by moving the decimal point to the right (lowers the value) or left (raises the value).
Metric Conversion Table |
|||||
| Kilo- (k) |
Base Unit (m, l, g) |
Centi- (c) |
Milli- (m) |
Micro- (µ) |
nano- (n) |
| x 1000 | meter, gram, liter | 100 | 1000 | 1000 | 1000 |
| 1000 | 1 | .01 | .001 | .000001 | .000000001 |
Convert the following values by moving the decimal point the correct number of spaces and in the right direction .
1. 69.8 meters (m) = ________________ centimeters (cm)
2. 152.97 milliliters (ml) = ________________ liters (l)
3. 42.67 liters (l) = _____________ milliliters (ml)
4. 299.32 kilometers (km) = ____________ nanometers (nm)
5. 26 grams (g) = _____________ kilograms (kg)
6. 123.43 centigrams (cg) = ______________ grams (g)
7. 75.2 liters (l) = __________________milliliters (ml)
8. 456.3 grams (g) = ________________ micrograms µg
9. 4507.22 kilometers (km) = _______________millimeters (mm)
10. 0.00297456 kilograms (kg) = ___________ nanograms (ng)
| BACK |
| Learning to Use the Microscope |
Introduction
“Micro” refers to tiny, “scope” refers to view or look at. Microscopes are tools used to enlarge images of small objects so as they can be studied. Microscopes range from a simple magnifying glass to the expensive electron microscope. The compound light microscope is the most common instrument used in education today. It is an instrument containing two lenses, which magnifies, and a variety of knobs to resolve (focus) the picture. It is a rather simple piece of equipment to understand and use. In this lab, we are going to learn the proper use and handling of the microscope.
Objectives
Materials
Procedures
Proper Handling of the Microscope
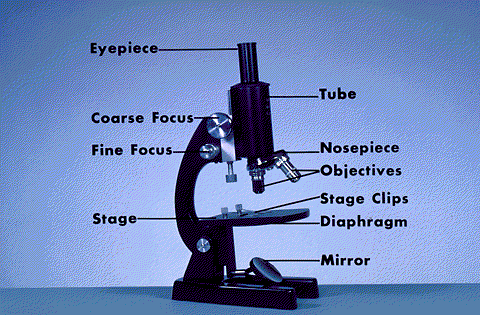
a. Eyepiece –
b. Body tube –
c. Objectives –
d. Stage –
f. Diaphragm –
g. Coarse adjustment –
h. Fine adjustment –
i. Base –
j. Light source –
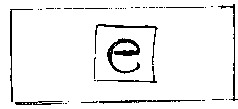
Preparing a wet mount of the letter “e”.
7. Offer an explanation of why this happened.
8. Looking through the eyepiece, move the slide to the upper right area of the stage.
What direction does the image move?
9. Now, move it to the lower left side of the stage. What direction does the image move?
10. Re-center the slide and change the scope to high power. You will notice the “e” is out of focus. Do Not touch the coarse focus knob, instead use the fine focus to resolve the picture.
11. Locate the diaphragm under the stage. Move it and record the changes in light intensity as you do so.
Determining Total Magnification:
1. Locate the numbers inscribed on the eyepiece and the low power objective and fill in the blanks below.
| Eyepiece magnification ______________ | (X) | Objective magnification ______________ | = | Total Magnification _____________X |
2. Do the same for the high power objective.
| Eyepiece magnification ______________ | (X) | Objective magnification ______________ | = | Total Magnification _____________X |
3. Write out the rule for determining total magnification of a compound microscope.
4. Remove the slide and clean it up. Turn off the microscope and wind up the wire so it resembles its original position. Place the low power objective in place and lower the body tube. Cover the scope with the dust cover. Place the scope back in its original space on the storage cart.
Summary:
Develop a procedure by which anyone can follow to demonstrate the proper handling of the microscope.
| BACK |