What Patients Should Know About Medical Device-Associated Infections

Modern medicine is truly a marvel. Whether itโ€™s a tiny valve keeping a heart beating in rhythm, a port making chemotherapy manageable, or a prosthetic hip restoring someoneโ€™s mobility, medical devices are life-changers. They help humans live longer, move better, and manage chronic conditions with dignity.

Itโ€™s no wonder that the global medical devices market is expected to cross $1030 billion in revenue by 2034. At the global stage, North America remained at the forefront of the medical device industry in 2025, capturing 38.1% of the global market.

However, as helpful as these tools are, they come with a small but significant risk of infections. The FDA receives over 2 million reports each year about medical device malfunctions and injuries. Donโ€™t be alarmed, though. Most infections linked to medical devices are preventable.

Here, weโ€™ll help you understand what these infections are, what signs to watch for, and how you can actively reduce your risk. Dive in, then!ย 

Common Types of Medical Devices Linked to Infections

Not all medical devices carry the same level of infection risk. Some devices, particularly those that remain in your body for extended periods or that penetrate your skin, require extra attention. 

Here are the most common types of devices associated with infections:

1. Implantable Port Catheter Devices

If you’re receiving long-term treatment like chemotherapy, your doctor might have recommended an implantable port. 

Implantable ports, such as port-a-caths, consist of a reservoir placed subcutaneously, usually in the chest. It connects directly to a large vein to spare your smaller veins from repeated needle sticks. 

Since the body treats port catheter devices as foreign material, there is a risk of serious complications. These include sepsis, blood clots, device malfunction, or catheter disconnection. Reports have revealed that infections occur in approximately 4.8% of chemoport cases. 

Devices of some brands have also faced scrutiny for structural failures. Bard is a case in point. Patients who got Bardโ€™s PowerPort device implanted suffered from serious injuries such as bloodstream infections, deep vein thrombosis, and sepsis due to device failure. 

Not surprisingly, thousands of patients across the country have filed the Bard PowerPort lawsuit against Bard Access Systems, Inc. and its parent company, Becton, Dickinson and Company. 

According to TorHoerman Law, plaintiffs in the lawsuit assert that design and manufacturing defects in their implantable ports caused catastrophic injuries to patients. 

2. Intravenous (IV) Lines and Central Lines

Almost everyone who’s spent time in a hospital has had an IV line. These thin, flexible tubes deliver fluids, medications, and nutrients directly into your veins. 

Standard IV lines usually stay in your arm or hand for just a few days. But central lines are larger catheters that reach the bigger veins near your heart and can remain in place much longer. Therefore, they pose a higher infection risk than peripheral IVs due to their length and the fact that they sit in large veins near your heart. 

Central line-associated bloodstream infections, or CLABSIs, are one of the most serious device-related infections. Infections happen when bacteria enter during the procedure, travel down the outside of the line, or create a biofilm. This biofilm is a sticky layer of bacteria that grows inside the catheter and can be very tricky to treat.

3. Surgical Implants

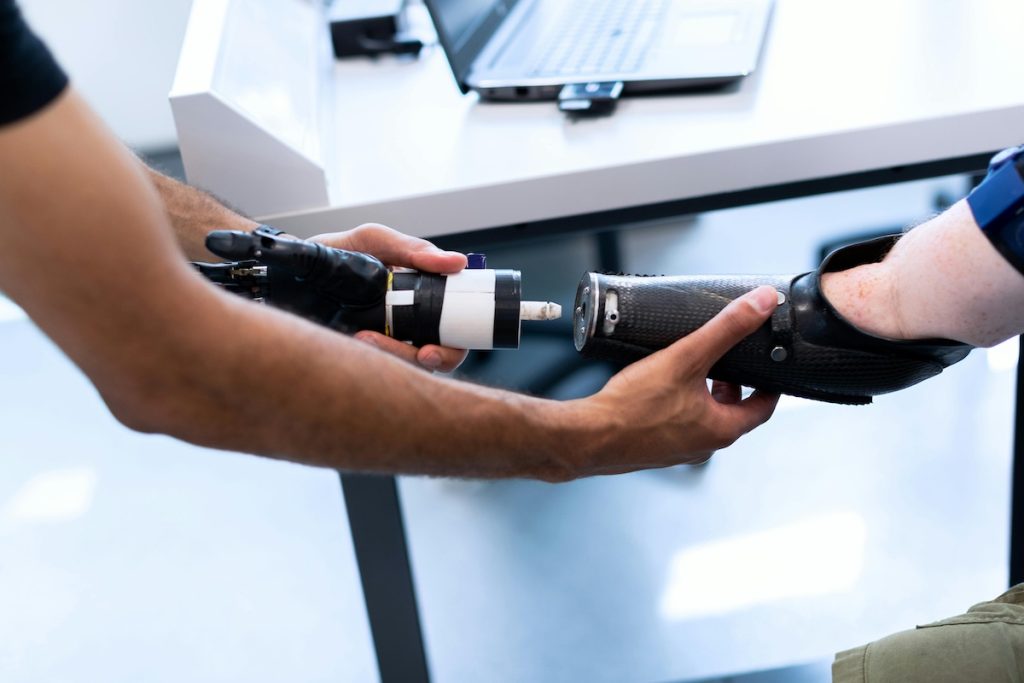
Surgical implants are designed to replace or support body parts. These include artificial joints, pacemakers, and heart valves. These devices are meant to be permanent or long-term.   

From hip and knee replacements to pacemakers and spinal hardware, surgical implants have helped millions of people regain mobility, independence, and quality of life. These devices are typically made from materials that your body tolerates well, like titanium or special plastics, and they are placed during sterile surgical procedures.

Despite all precautions, infections can occasionally develop around surgical implants. Sometimes infections happen soon after surgery when bacteria enter through the incision. Other times, infections develop months or even years later if bacteria from another part of your body travel through your bloodstream and settle on the implant. 

Orthopedic implants like artificial joints are particularly vulnerable because they can’t heal and integrate into your body the way natural tissue does. If bacteria form a biofilm on the implant’s surface, they become incredibly difficult to eliminate with antibiotics alone.

Signs and Symptoms of Medical Device-Associated Infections

The sooner an infection is caught, the easier it is to treat. Keep a close eye out for these red flags:

  • Redness or warmth around the insertion site or surgical incision
  • Swelling or tenderness that’s new or getting worse
  • Drainage or pus from the siteย 
  • Pain that increases as time passes
  • Skin that feels hot to the touch
  • The area around the device looks different from what it did before

What Patients Can Do to Reduce Infection Risk

You’re not helpless in preventing medical device-associated infections. There are several concrete steps you can take to protect yourself. Here are a few of them:

1. Practice Good Hand Hygiene

Hand hygiene is the single most effective way to prevent the spread of germs. Germs live on hands and can easily move to a medical device. Proper handwashing removes these transient organisms.   

Follow a five-step process to wash your hands properly: wet, lather, scrub, rinse, and dry. Scrub for at least 20 seconds, making sure the backs of hands, between fingers, and under fingernails are scrubbed. 

If washing is not possible, use an alcohol-based sanitizer that contains at least 60% alcohol. Rub it over all surfaces until the hands are completely dry. This normally takes about 20 seconds. However, sanitizer does not work well on visibly dirty or greasy hands. In those instances, soap and water are mandatory. 

2. Keep the Device Area Clean and Dry 

Bacteria thrive in moist environments. This is why keeping your device site clean and dry is important.

If you have a medical device outside your body or a site in the body where a catheter enters, carefully follow your healthcare provider’s directions for cleaning. This typically includes gentle cleansing with soap and water or a special antiseptic solution, followed by thorough drying. 

Protect your device’s site during showering or bathing according to your instructions. Some devices should be covered with waterproof dressings or plastic wrap; others should not be submerged in water at all. 

Your healthcare team will provide guidance depending on your type of device. Gently pat the skin dry rather than rubbing because rubbing may irritate the skin. Pay attention to your dressings too. If a bandage or dressing becomes wet, dirty, or loose, change it right away.  

3. Follow Care Instructions at Home

Your healthcare provider will give you detailed instructions for caring for your device at home. These instructions aren’t suggestions but evidence-based practices designed specifically to keep you safe.

This might include flushing your catheter with saline or heparin at specific intervals or applying antibiotic ointment to insertion sites. Your healthcare provider might also advise taking prescribed antibiotics to prevent infection or avoiding certain activities that could contaminate or damage your device. 

Write these instructions down or ask for them in writing if they are only given verbally. Don’t be embarrassed to ask questions if something isn’t clear. Ask your nurse or doctor to show you the technique rather than just describing it. 

Many healthcare facilities offer video resources or written materials you can reference at home. Some even provide 24-hour hotlines you can call if questions come up later.

4. Attend Follow-Up Appointments

Follow-up visits are not just a formality. They are an essential part of infection surveillance. Doctors use these visits to monitor the healing process. They check for subtle signs that you might miss.

During these visits, doctors may perform several checks. They conduct physical exams of the device site. They may order blood tests to look for inflammatory markers like CRP (C-reactive protein). Follow-up appointments also help doctors identify complications such as blood clots or device shifting before they become emergencies.   

For cardiac devices, you’ll typically have an initial checkup within six weeks and follow-ups every few months. Your team will check your healing progress and use a device programmer to monitor the battery. 

If youโ€™re an oncology patient, youโ€™ll have to keep up with your port flushes even after your sessions are done. Keeping the port flushed ensures it stays in good working order, for whenever you might need it. 

Knowledge is Your Best Protection

Medical devices save lives and improve health every day. While infections are a potential risk, they are not inevitable, and most patients never experience serious problems. 

You can significantly reduce your risk if you stay informed and follow care instructions closely. 

Remember, you are an active partner in your care, not just a recipient of treatment. If you ever feel unsure, uncomfortable, or worried, speak up. Healthcare works best when patients and providers work together, with trust, awareness, and a shared goal of keeping you safe and well.

Paper Chromatography Lab: Separating the Components of Black Ink

Introduction to Chromatography in the Science Classroom

Chromatographyย is a fundamental technique used in chemistry and biology to separate mixtures into their individual components. In this experiment, we explore howย paper chromatographyย can be used to analyze and isolate the different pigments found in black ink.

The process relies on the movement of a solvent (in this case, water) through a medium (filter paper). As the solvent travels up the paper, it carries along the dissolved components of the mixture. Each substance moves at a different rate based on its molecular characteristicsโ€”such as size, solubility, and affinity for the paper. This separation allows for a visual and measurable representation of what the mixture is composed of.

Chromatography is widely used in scientific research for chemical analysis, substance purification, and compound identification. It also plays a role in detecting changes in chemical properties due to biological or chemical reactions. For students and educators, it’s a hands-on way to visualize how mixtures behave at the molecular level.


Hypothesis

Paper chromatography can be used to separate the individual pigments that make up black ink.


Materials

  • Filter paper strip
  • Test tube
  • Rubber stopper
  • Straightened paper clip (with hook)
  • Black felt-tip marker
  • Pencil
  • Metric ruler
  • Tap water (used as solvent)
  • Eraser
  • Computer (for data analysis or reporting)

Procedure: How to Perform Paper Chromatography

  1. Prepare the apparatus: Straighten a paper clip and add a hook at one end. Insert the other end into the center of the rubber stopper.
  2. Attach the filter paper: Hang a strip of filter paper from the hook. Ensure it hangs freely and doesnโ€™t touch the sides of the test tube.
  3. Draw baseline: Remove the strip and draw a 5-mm-wide black band approximately 25 mm from the bottom using the black felt-tip pen.
  4. Mark solvent limit: Draw a pencil line 10 cm above the ink band. This will be the upper limit for the solvent’s movement.
  5. Add the solvent: Pour 2 mL of water into the test tube. Reinsert the filter paper so the bottom touches the water, but the black band remains above it.
  6. Observe separation: As the solvent moves up the paper, watch the ink pigments begin to separate.
  7. Remove and measure: When the solvent reaches the pencil line, remove the strip. Let it dry and measure how far each color moved.
  8. Record your data: Use a ruler to measure the distance traveled by each pigment and the solvent. Calculate theย Rf valueย (retention factor) for each pigment using the formula:Rf = Distance traveled by pigment / Distance traveled by solvent

Results: Pigment Separation Data

ColorDistance Traveled (mm)Solvent Distance (mm)Rf Value
Yellow70 mm111 mm0.63
Pink82 mm111 mm0.74
Red101 mm111 mm0.91
Purple110 mm111 mm0.99
Blue111 mm111 mm1.00

Analysis & Discussion

  1. How many pigments were separated from the black ink?
    Five: yellow, pink, red, purple, and blue.
  2. What solvent was used?
    Tap water.
  3. What was the first visible color during the separation?
    Orange or yellow appeared first, indicating it traveled the fastest.
  4. In what order did the pigments separate (top to bottom)?
    Blue, purple, red, pink, and yellow.
  5. How far did the solvent travel?
    111 mm.
  6. What does this tell us about black ink?
    Black ink is not a pure substanceโ€”itโ€™s a mixture of various colored pigments.
  7. Why did the pigments separate?
    Differences in molecular size, solubility, and paper affinity cause each pigment to move at a unique rate.
  8. Why did some pigments travel farther than others?
    Less absorbent pigments that are more soluble in the solvent moved farther up the paper.

Error Analysis

Some possible sources of error in this paper chromatography experiment include:

  • Measurement inaccuracies: Small errors in reading distances can affect Rf values.
  • Solvent volume inconsistencies: Too little or too much solvent may alter the pigment spread.
  • Filter paper length: A longer strip might have shown additional colors or more precise separations.

Conclusion

The results supported the hypothesis: paper chromatography successfully separated black ink into multiple pigments. The experiment demonstrated how different molecular characteristicsโ€”such as solubility and affinity to the filter paperโ€”affect the movement of each component in a mixture. This hands-on experiment reinforces the idea that seemingly simple substances can contain complex chemical compositions.

Chromatography remains an essential tool in both educational and professional laboratory settings. From forensic science to biochemistry, the ability to separate and analyze chemical mixtures is foundational to understanding the materials around us.

How Can a Symptom Checker Assist in Early Detection of Proptosis? Key Insights for Eye Health

Symptom checkers use artificial intelligence to help people recognize early signs of proptosis by analyzing user descriptions of eye changes. These digital tools offer immediate feedback when users notice bulging eyes or related symptoms, though they cannot replace professional medical diagnosis. For example, exploring proptosis causes with Ubie Health or other similar tools can guide users through targeted questions to help identify possible underlying conditions such as thyroid eye disease or orbital tumors.

How Symptom Checkers Identify Early Signs

Symptom checkers analyze user input about eye-related changes through structured questions and visual assessments. The apps typically ask about eyelid swelling, double vision, and changes in eye appearance. Some advanced systems can process photos to detect visible signs of eye protrusion.

These tools use machine learning algorithms to compare user symptoms with known patterns of proptosis. The technology recognizes key indicators such as:

  • Visible eye bulging or forward displacement
  • Eyelid retraction or inability to close eyes completely
  • Double vision or changes in eye movement
  • Eye pain or pressure sensations
  • Changes in vision quality or clarity

Modern symptom checkers employ natural language processing to understand how users describe their symptoms. This allows people to input concerns in their own words rather than medical terminology.

The artificial intelligence can identify symptom combinations that suggest proptosis development. Early detection becomes possible when users report subtle changes they might otherwise ignore.

Benefits of Early Self-Assessment

Early self-assessment through symptom checkers allows people to recognize concerning eye changes before they become severe. Users can identify potential proptosis symptoms in the comfort of their homes without immediate medical costs.

These tools provide instant feedback about symptom severity and urgency. People receive guidance on whether their symptoms need immediate attention or can wait for routine care. This helps prevent unnecessary emergency room visits while identifying serious cases that need prompt treatment.

Symptom checkers document symptom progression over time through tracking features. Users can record changes in bulging eyes or related symptoms, creating a timeline for healthcare providers. This information helps doctors understand how quickly proptosis developed.

The apps educate users about proptosis symptoms they might not recognize. Many people dismiss early eye changes as minor issues. Symptom checkers raise awareness about warning signs that deserve medical attention.

Self-assessment tools work 24 hours a day, allowing symptom evaluation when medical offices are closed. This immediate access helps people make informed decisions about seeking urgent care for eye health concerns.

Limitations and Considerations

Symptom checkers cannot perform physical examinations needed for accurate proptosis diagnosis. They cannot measure actual eye protrusion or assess internal eye structures. Professional medical evaluation remains necessary for definitive diagnosis.

The technology may miss subtle early signs that trained eye specialists would detect. Complex cases involving multiple symptoms might overwhelm basic symptom checker algorithms. Users with unusual presentations may receive inaccurate assessments.

These tools depend on accurate user input to function properly. People may struggle to describe their symptoms clearly or may minimize concerning changes. Inaccurate descriptions lead to unreliable results.

Key limitations include:

  • Cannot replace professional eye examinations
  • May miss rare or complex proptosis causes
  • Limited ability to assess symptom severity accurately
  • Depends on user’s ability to describe symptoms

False reassurance represents a significant risk when symptom checkers underestimate serious conditions. Users might delay necessary medical care based on incorrect app assessments. This delay could worsen proptosis outcomes if underlying causes remain untreated.

Privacy concerns arise when users share sensitive health information with digital platforms. People should understand how their eye health data gets stored and used by symptom checker companies.

Recognizing Key Symptoms of Proptosis

Proptosis shows specific signs that people can spot early with careful observation. The main symptoms include eyes that stick out more than normal, increased white area around the eye, restricted eye movement, and seeing double images.

Bulging or Protruding Eyes

The most noticeable sign of proptosis is when one or both eyes appear pushed forward from their normal position in the eye socket. This creates a distinct bulging appearance that makes the eyes look larger or more open than usual.

Bulging eyes may develop slowly over weeks or months. Some people notice the change when looking in mirrors or photos. Family members often spot the difference before the person does.

The bulging can affect one eye or both eyes at the same time. When eyes protrude forward, closing the eyelids completely becomes harder. This leads to dryness and irritation.

People may feel pressure or discomfort around their eyes as the bulging develops. The protruding eyes can make a person look surprised or startled all the time.

Increased Visibility of the Sclera

Normal eyes show only small amounts of the white part called the sclera around the colored iris. When proptosis occurs, much more of this white area becomes visible above or below the iris.

This increased sclera visibility makes the eyes appear wider or more open. The change is often most noticeable above the iris, where extra white space shows between the upper eyelid and the colored part of the eye.

Friends and family may comment that the person’s eyes look different. Photos often reveal this change more clearly than looking in a mirror.

The increased white area around the eyes is an early warning sign. When combined with other symptoms, it suggests the need for medical evaluation.

Changes in Eye Movement

Proptosis affects how smoothly the eyes move in different directions. People may notice their eyes feel stiff or restricted when looking left, right, up, or down.

The extra pressure behind bulging eyes limits how well the eye muscles work. This makes normal eye movements feel awkward or uncomfortable.

Common movement problems include:

  • Difficulty looking upward
  • Stiffness when moving eyes side to side
  • Pain or discomfort during eye movement
  • Trouble keeping both eyes pointed at the same object

These movement changes happen because swollen tissues crowd the space behind the eyes. The muscles that control eye movement cannot work normally in these tight conditions.

Double Vision and Diplopia

Diplopia means seeing two images of a single object instead of one clear image. This happens when the eyes cannot align properly due to muscle problems or pressure changes.

Double vision may appear as images side by side or one above the other. Some people see the double images all the time, while others notice them only when looking in certain directions.

The problem may start suddenly or develop gradually over time. Early stages might show brief episodes of double vision that come and go.

Diplopia often occurs before other obvious signs of proptosis appear. This makes it an important early warning sign that should not be ignored.

People with double vision may close one eye to see clearly or tilt their head to reduce the problem. These actions help temporarily but do not fix the underlying cause.

Common Causes and Associated Conditions

Proptosis develops from several distinct medical conditions, with thyroid disorders being the most frequent cause. Other conditions like infections, tumors, and injuries can also lead to bulging eyes, each requiring different treatment approaches.

Thyroid Eye Disease and Graves’ Disease

Thyroid eye disease (TED) accounts for the majority of proptosis cases in adults. This autoimmune condition occurs when the body’s immune system attacks tissues around the eyes and thyroid gland.

Graves’ disease causes about 90% of thyroid-related eye problems. People with this condition produce too much thyroid hormone, which leads to hyperthyroidism. About 1 in 4 people with Graves’ disease will develop eye symptoms.

The connection between thyroid problems and bulging eyes happens because inflammation affects the muscles and tissues behind the eyes. This swelling pushes the eyeballs forward from their normal position.

Key symptoms of thyroid eye disease include:

  • Bulging of one or both eyes
  • Eyelid retraction (pulled-back eyelids)
  • Dry eyes from incomplete eyelid closure
  • Double vision
  • Eye pain and pressure

About 90% of people with TED experience eyelid retraction along with proptosis. This combination can cause serious complications if left untreated, including permanent vision loss from optic nerve compression.

Other Causes of Exophthalmos

Several non-thyroid conditions can cause exophthalmos. These causes often affect only one eye, unlike thyroid disease which typically affects both eyes.

Cancer represents a serious cause of proptosis. Primary eye cancers like melanoma or carcinoma can start around the eye area. Cancer that spreads from other body parts can also cause bulging eyes. Breast cancer is the most common type that spreads to the eye area.

Physical injuries can lead to proptosis through different mechanisms. Trauma to the eye socket can cause blood to collect behind the eye (retrobulbar hematoma). Skull fractures near the eye can allow air to enter the eye socket, pushing the eye forward.

Infections like orbital cellulitis cause severe inflammation around the eye. These infections often start in the sinuses or mouth and spread to the eye area. Without quick treatment, these infections can become life-threatening.

Blood vessel disorders from autoimmune diseases can also cause eye bulging. These conditions affect the normal blood flow around the eyes.

Distinguishing Proptosis from Similar Conditions

Medical professionals must separate proptosis from other eye conditions that might look similar. Buphthalmos affects newborns and young children, causing enlarged eyes rather than protruding ones. This condition usually results from congenital glaucoma.

Conjunctivitis causes red, swollen eyes but does not make the eyeball protrude from the socket. The inflammation stays on the eye’s surface rather than affecting deeper tissues.

Glaucoma in adults typically does not cause eye bulging. However, severe cases in infants can lead to enlarged eyes that might be confused with proptosis.

Doctors measure eye protrusion to confirm proptosis. A protrusion of more than 2 millimeters beyond normal position indicates true proptosis. They also check for other signs like eyelid retraction, eye movement problems, and vision changes.

Bilateral proptosis (both eyes affected) usually points to thyroid disease. Unilateral proptosis (one eye affected) more often suggests tumors, infections, or injuries as the cause.

Conclusion

Symptom checkers serve as valuable first-line tools for identifying potential proptosis symptoms. These digital platforms help users recognize bulging eyes and related warning signs that might otherwise go unnoticed.

Early detection through symptom checkers can lead to faster medical intervention. This timing matters because some causes of proptosis progress rapidly and may result in permanent vision loss if left untreated.

The technology works best when users answer questions honestly about their symptoms. Common indicators include:

  • Eye protrusion
  • Double vision
  • Eye pain or pressure
  • Difficulty moving eyes

However, symptom checkers cannot replace professional medical evaluation. They should guide users toward seeking appropriate eye care rather than providing definitive diagnoses.

The combination of accessible symptom checking tools and prompt medical follow-up creates the best pathway for managing proptosis. Users who notice potential symptoms through these platforms can take action before complications develop.

The Role of Bioconjugation in Progressing Medical Innovations

Bioconjugation plays an important role in the advancement of targeted therapies and vaccines. This innovative process involves linking biological molecules to other compounds, which makes precise targeting in treatments possible. By improving the specificity and efficiency of therapies, bioconjugation contributes significantly to modern medicine.

The development of targeted therapies and vaccines requires precision to maximize effectiveness while minimizing side effects. Bioconjugation offers a solution by enabling the attachment of therapeutic agents to specific molecules, aiding in the delivery directly to diseased cells. This specificity is crucial in treating complex conditions, reducing the impact on healthy cells.

Bioconjugation Basics

Bioconjugation makes it possible to link two molecules together, which is an important technique for the development of targeted therapies and vaccines. The technique can be used to enhance therapeutic agents such as antibodies, peptides, and nanoparticles.

Bioconjugation Chemistry

When we refer to bioconjugation chemistry, weโ€™re talking about the chemical methods that are used to join two different molecules. These methods can include covalent and non-covalent bonding, which are essential for creating stable molecules with good functionality.

Bioconjugation chemistry is commonly used to link antibodies with drugs, peptides, and nanoparticles, which allows us to create targeted therapeutic treatments with better outcomes. Different strategies, such as polymer-drug conjugates and lipid nanoparticles, provide us with a diverse range of applications for these drug delivery systems.

Additionally, aptamers and small molecules are often used to improve specificity and reduce off-target effects. These methods contribute significantly to developing tailored treatments in the pharmaceutical industry. The combinations that are possible through bioconjugation are extensive, hence companies such as LifeSynth Solutions offer custom bioconjugation chemistry services for a wide range of applications to speed up research time.

Clinical Applications of Bioconjugates

Bioconjugates have many different clinical applications due to their ability to deliver drugs directly to specific cells or tissues. Monoclonal antibodies are frequently conjugated with therapeutic agents which can make some cancer treatments more effective and reduce their negative impact on surrounding healthy cells.

Bioconjugates show the most promise for creating targeted therapies, which typically improve patient outcomes. A promising area of bioconjugation research in in the development of lipid nanoparticles which can be used to deliver mRNA and siRNA, greatly improving the way that we develop and deliver vaccines.

Weโ€™re now seeing that several bioconjugates are being tested in clinical trials for both therapeutic and diagnostic applications. These trials are very important for making sure that the bioconjugates are safe to use and remain effective when in the body.

Bioconjugates in Drug Development

Bioconjugates play a very important role in drug development, particularly in designing next-generation therapies. They allow us to make highly specific drug delivery systems using a combination of antibodies, peptides, and nanoparticles.

The reason why they are so important is because they have a focus on targeted drug delivery, which minimizes the side effects a patient may experience and overall improves how efficient a drug is. In particular, this approach is expected to make huge improvements in the way that we treat patients with cancer and chronic diseases.

Additionally, bioconjugation makes it easier for us to create personalized medicines which are tailored to a patientโ€™s individual needs.

Targeted Therapies in Disease Management

Mechanisms of Targeted Drug Delivery

Targeted drug delivery uses bioconjugates to improve how drugs are delivered to specific cells, such as cancer cells. Antibody-drug conjugates (ADCs) are a good example of this, as they combine the specificity of antibodies with potent drugs to precisely attack tumors while minimizing the negative impact on surrounding healthy cells.

We can also incorporate nanocarriers to improve the cellular uptake and distribution of a drug. By exploiting features like the tumor microenvironment’s increased permeability and retention effect, we can make it so that drugs accumulate directly in tumor sites. Active targeting strategies often use ligands or antibodies that bind to receptors overexpressed on cancer cells, which makes precise tumor targeting and drug action possible.

Drug Resistance

Drug resistance remains a challenge across all of medicine, but is especially prevalent in how we manage diseases with targeted therapies, particularly in cancer treatment. Tumor heterogeneity and mutations often cause the efficacy of drugs to decrease over time. Because of this, patient-tailored medicine with routine monitoring becomes a key strategy to prevent drug resistance from occurring.

Bioconjugation strategies can be used to prevent or overcome drug resistance by creating more effective combinatorial therapies. These make use of multiple different agents that can target distinct pathways, thus bypassing resistance mechanisms that have developed. Using synthetic biology to develop drugs that adapt to changes in the tumor environment helps in keeping treatments effective, therefore improving patient outcomes.

Vaccine Design and Immune Modulation

Vaccine Formulation

Modern vaccine design has moved towards precise targeting of our bodyโ€™s immune responses. mRNA vaccines, such as those developed for COVID-19, use synthetic strands of genetic material to instruct cells to produce SARS-CoV-2 antigens. This method is particularly good as it allows us to quickly develop vaccines at a large scale.

Cancer vaccines, on the other hand, focus on delivering tumor antigens to activate immune cells against cancerous cells. Effective vaccines need to navigate the major histocompatibility complex (MHC) to achieve a good level of antigen presentation. Using monoclonal antibodies to do this offers specific targeting whilst reducing unintended off-target effects.

Immune Responses

Boosting immune efficacy is crucial, particularly through cellular immunity and t cell engagers. Immune checkpoint modulation, such as PD-L1 blockade, augments T-cell activity and enhances tumor recognition.

Cytokine release syndrome is a potential adverse effect which is usually caused by excessive immune activation. As a result, balancing immune potency whilst minimizing side effects remains a key goal of bioconjugation research. For example, therapeutic cancer vaccines aim to induce a strong immune response against cancerous cells without triggering excessive inflammation surrounding healthy cells.

Bioconjugation for Targeted Immune Activation

Bioconjugation makes it possible for us to target specific immune pathways by linking molecules to antigen-presenting cells. This means that vaccines using this strategy can directly interact with the desired immune cells, which overall improves the specificity of immune recognition.

This approach is very important for developing vaccines that can cause tailored immune responses against particular pathogens or tumor cells. As a result, targeted immune cell engagers are a focus of current research, with the aim of directing T cells to tumor sites effectively. This strategy aims to help overcome immune checkpoint modulation, prompting more effective therapeutic outcomes.

Conquering Your Biology Paper Starts with Smart Preparation

When you sit down to write a biology paper, it can be scary. So many science terms, so much research, so many expectations. But it doesnโ€™t have to be that hard. If you start with smart preparation, youโ€™ll find that the writing process goes a lot more smoothly, and youโ€™ll feel more confident writing about the most challenging subjects. Letโ€™s break it down into easy steps to ace your Biology paper.

High School and College Biology Papers

Writing Biology Papers

1. Choose a Focused Topic

A good first step in smart prep is to select a topic thatโ€™s relatively narrow and manageable. The subject of Biology is so vast that to succeed, youโ€™ll have to narrow your focus. Your topic will be too broad if you donโ€™t know where to start your search and donโ€™t know when youโ€™ve covered enough. You can overcome these problems by zeroing in on a specific question or issue. For example, instead of โ€œThe Human Immune Systemโ€, consider โ€œThe Role of T-Cells in Fighting Viral Infectionsโ€. A narrow topic makes it easier to stay on track and allows you to go deeper in your research.

2. Conduct Thorough Research

Now you have chosen your topic, it is time to get down to business โ€“ research! For any good biology paper, your sources always need to be robust. That means peer-reviewed journal articles, books, and academic websites. Be sure to organize your research as you go. Keep a notebook or digital document handy for saving quotations, studies, and other facts that you plan to use in your paper. This will help you avoid a frantic search once youโ€™re ready to put pen to paper. 

3. Develop a Clear Thesis Statement

Your biology paper thesis needs to be clear. If your thesis is strong, it will set the direction of your Biology paper while allowing you to focus on the points that you want to make. If we continue with our previous example, a thesis for a biology paper on T-cells could be like this: โ€œT-cells are important because they identify and eliminate infected cells that are infected by viruses, thus preventing the spread of infectionsโ€. Your thesis should be concise, specific, and backed by the research youโ€™ve conducted.

4. Create an Outline

An organized outline is perhaps the single most important thing to do when preparing for any paper. Use your outline to map out the order of your essayโ€™s thoughts and arguments so that your ideas flow in a logical manner.

5. Use Visuals to Support Your Argument

Biology papers often grapple with concepts and processes that are hard to describe with words alone. Charts, diagrams, and graphs can help you explain scientific ideas more effectively and make your paper more inviting to read. For instance, if youโ€™re writing about cell division, an easy-to-understand diagram of mitosis can make your explanation easier to follow. Donโ€™t forget to label any visuals you add.

6. Break the Writing Into Sections

Donโ€™t try to write the whole paper simultaneously, as that will leave you frustrated and exhausted. Instead, break up the writing into chunks. Write a paragraph. Or one section. Get that part done well, and then go to the next part of your paper. Having mini-goals makes it less overwhelming and will help you pay equal attention to each part of your paper.

7. Consider Using Essay Writers for Hire

If you have multiple assignments and deadlines to meet, you can get easily stuck and not know what to write first. Or maybe the topic you were assigned is too broad or complex to handle in a given time. In that case, there are services that can help you with this task. Essay writers for hire can help you create a well-researched and well-structured biology paper. This will leave you with some free time for your other projects.

8. Proofread and Edit Your Work

After you have completed your paper, you might be tempted to hit โ€˜submitโ€™ and call it a day, but take the time to proofread and edit your paper. Your paper should be free of spelling, grammar, and punctuation mistakes, and all of your ideas should flow seamlessly from one section to the next. If you can, you should reread your work after a break with a fresh set of eyes. You may see what you initially didnโ€™t notice.

9. Cite Your Sources Properly

Biology papers rely on a substantial amount of external sources, and they need to be cited properly. Cite the sources using whatever citation style your professor asks for โ€“ APA, MLA, or Chicago. Using the correct citation rules gives your work more credibility. If youโ€™re not sure how to cite a source, numerous online tools, such as Citation Machine, can do the formatting for you.

10. Donโ€™t Stress โ€“ Youโ€™ve Got This!

When you write a biology paper, you donโ€™t have to be afraid. You can be smart about it. You can plan it out. This way, youโ€™ll have your biology paper done in a breeze. Start early. Stay organized. And seek out help when you need it. Remember โ€“ you have what it takes to deliver an awesome paper.

Prep Smart, Write Confidently

The key to nailing your biology paper lies in careful preparation, from choosing a specific topic to proofreading the final draft. Every step of the way, your preparation builds on the previous step to a well-researched, effective essay. Preparing well and writing with confidence are the best ways to conquer that college paper. So, grab a pen and get ready to ace your biology paper!